|
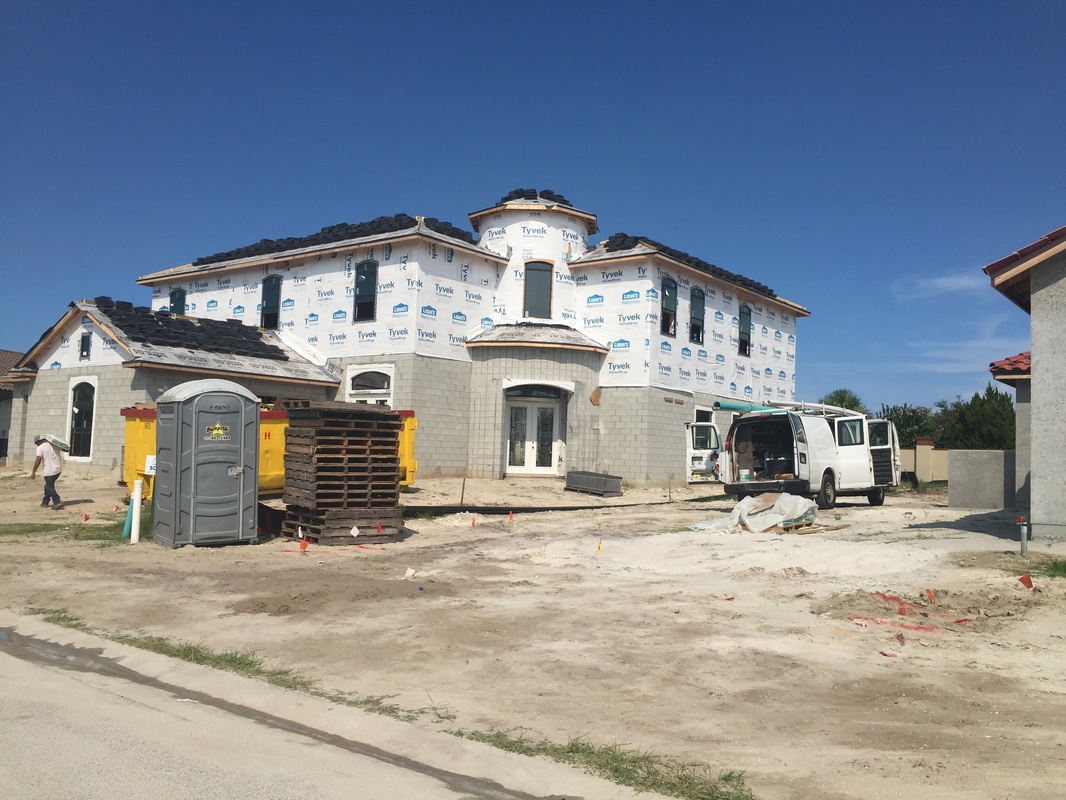
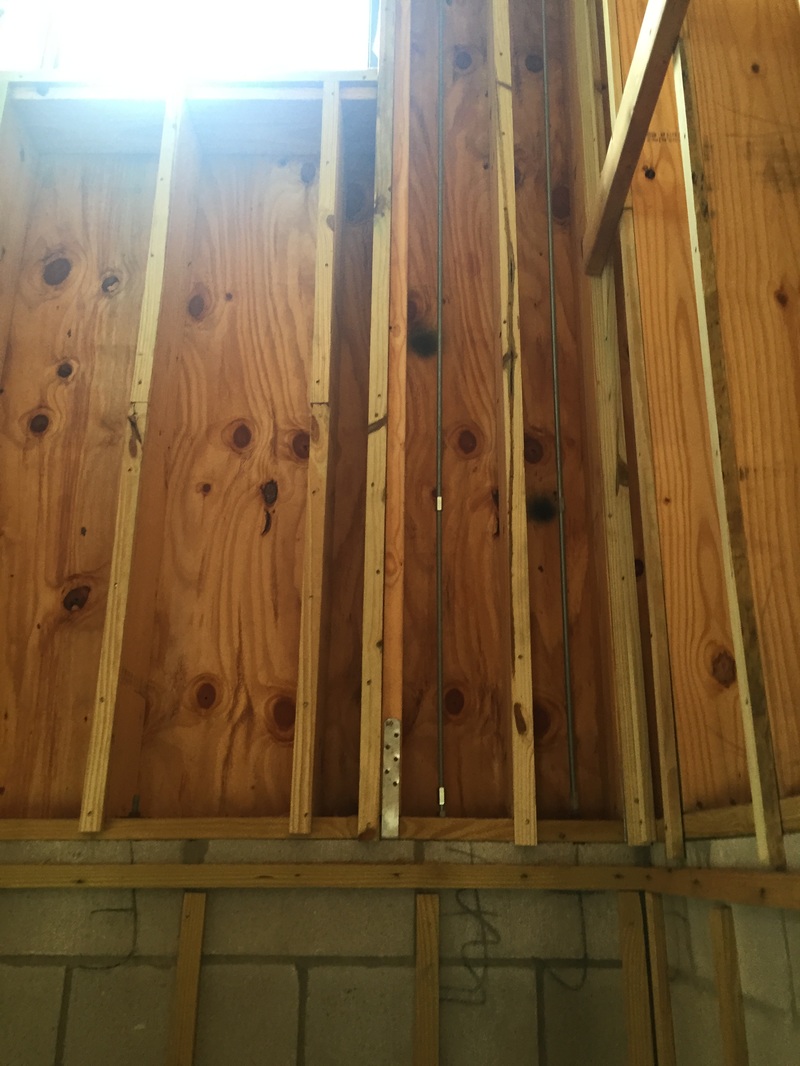
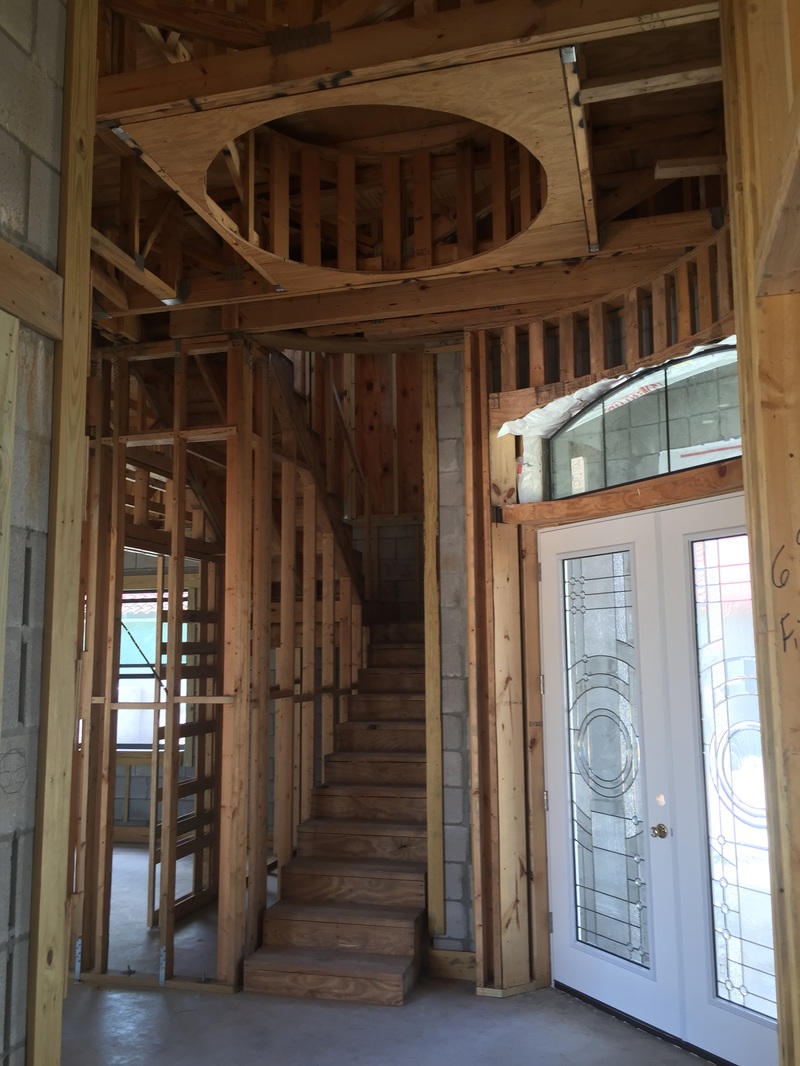
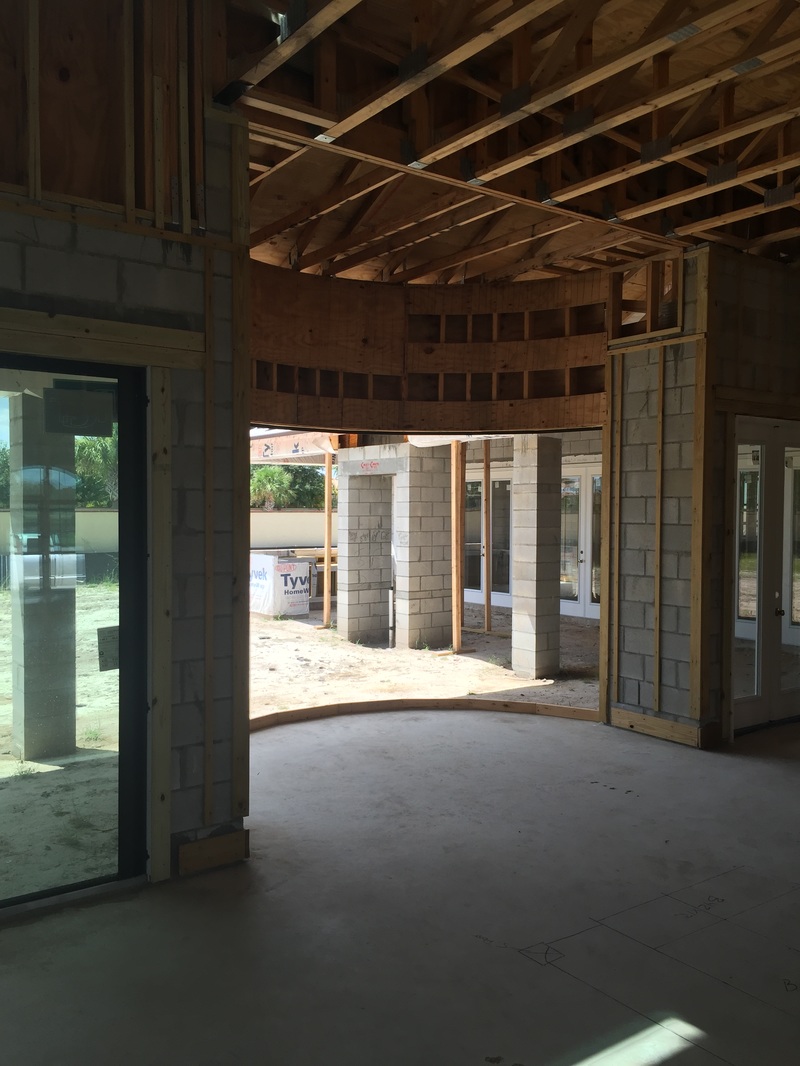
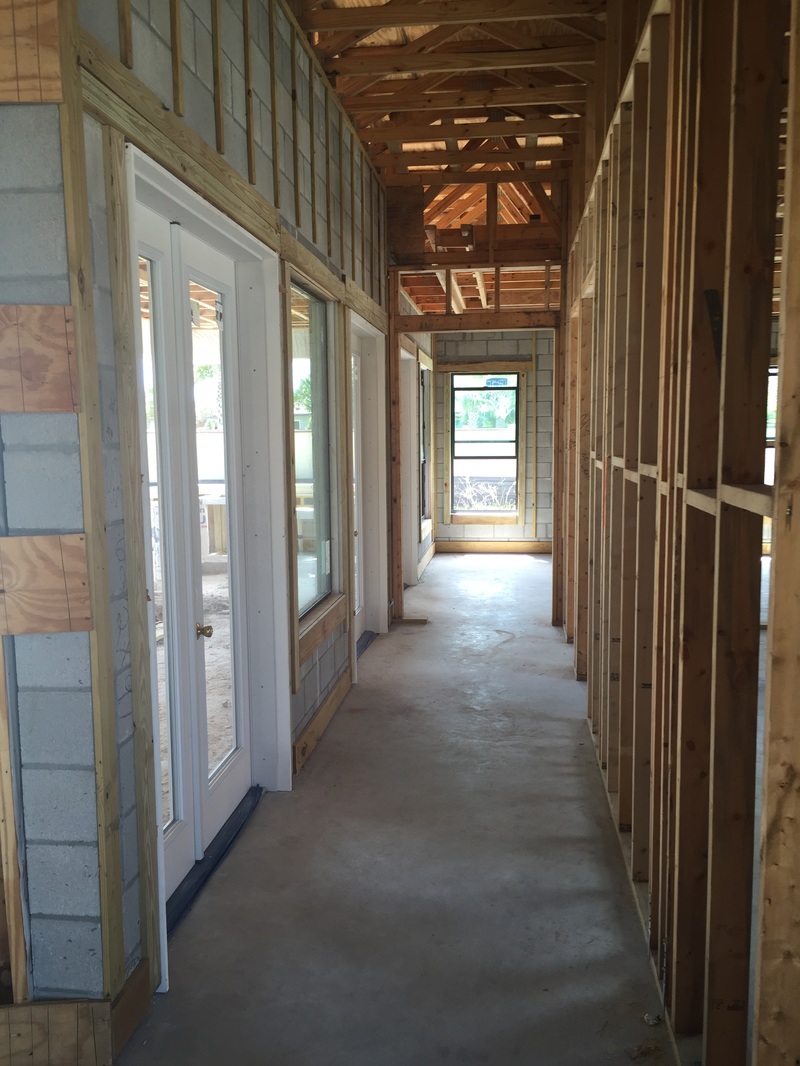
Welcome back everyone, You will find attached photos recently shot shortly after the framing stage was completed. Of course, the first photos are of the front of the house. They were taken facing the two story round Entry. Hopefully, you can see how this acts as a visual hinge to the sides of the house which are perpendicular to each other. The second photo shows how the second floor is tied down to the first floor. All threaded rods (A.T.R.) are coupled to anchor bolts which are set into the steel reinforced concrete bond beam below. At the top of the frame wall are nuts and washers connected to the A.T.R.. All of this helps hold the second floor frame walls to the first floor during a hurricane. The A.T.R.'s are placed in each corner, on each side of all second floor openings, and no more further apart than 6'-0" on center. The third photo was taken in the Foyer looking up thru the circular opening in the ceiling into the second floor Rotunda above. This not only brings additional natural light into the Foyer, but it will also have a pretty cool, stainless steel wire railing system at the second floor which will be visible from below. The fourth photo shows the circular wall in the Breakfast Nook looking out to the Covered Porch and Pool area. This will have an aquarium glass window that goes from 8'-0" off the floor at the top to the floor itself at the bottom. And finally, the last photo shows the Gallery that runs parallel to the Covered Porch. Instead of being a normal 3'-0" wide Hall, I made it nearly 6'-0" wide to ease the circulation patterns in the house. I also did this to make the house feel more open and spacious. Stay tuned for my next update where you will start to see the drywall being installed, the walls being stuccoed, and the roof tiles being laid. Have a great week! Jeff Hello again everyone, You can see in the attached photos that the block mason is busy laying up the concrete blocks. In one of the photos you will see how we addressed the round wall of the Foyer. Instead of using a precast concrete lintel block beam above the front doors, the block mason used narrow lintel blocks and supported them with a temporary frame wall until the concrete was poured inside of them. Of course, the lintel blocks also had steel rebar inside for additional support. You can see in the other photo that there is one room where are no concrete blocks. This is the Breakfast Nook area that looks onto the Covered Porch. There are no concrete blocks because this whole area is going to receive aquarium glass (a.k.a.-butted glass) to the floor. Because it is aquarium glass with the glass panels actually touching each other in the corners, there are no structural columns or posts in the corner to support the weight of a roof or floor above. Therefore, all of the weight is transferred out onto the beams on the Covered Porch. Please stay tuned for my next posting which will show the carpenters in action framing up the house. Thanks, Jeff 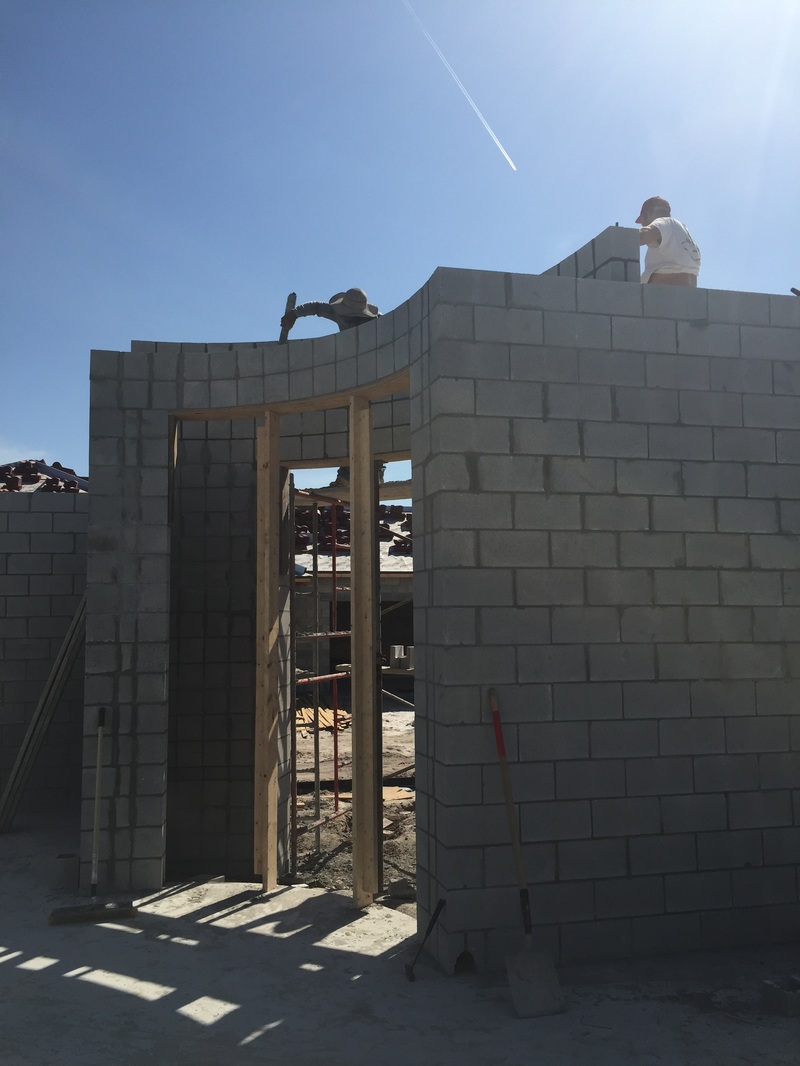 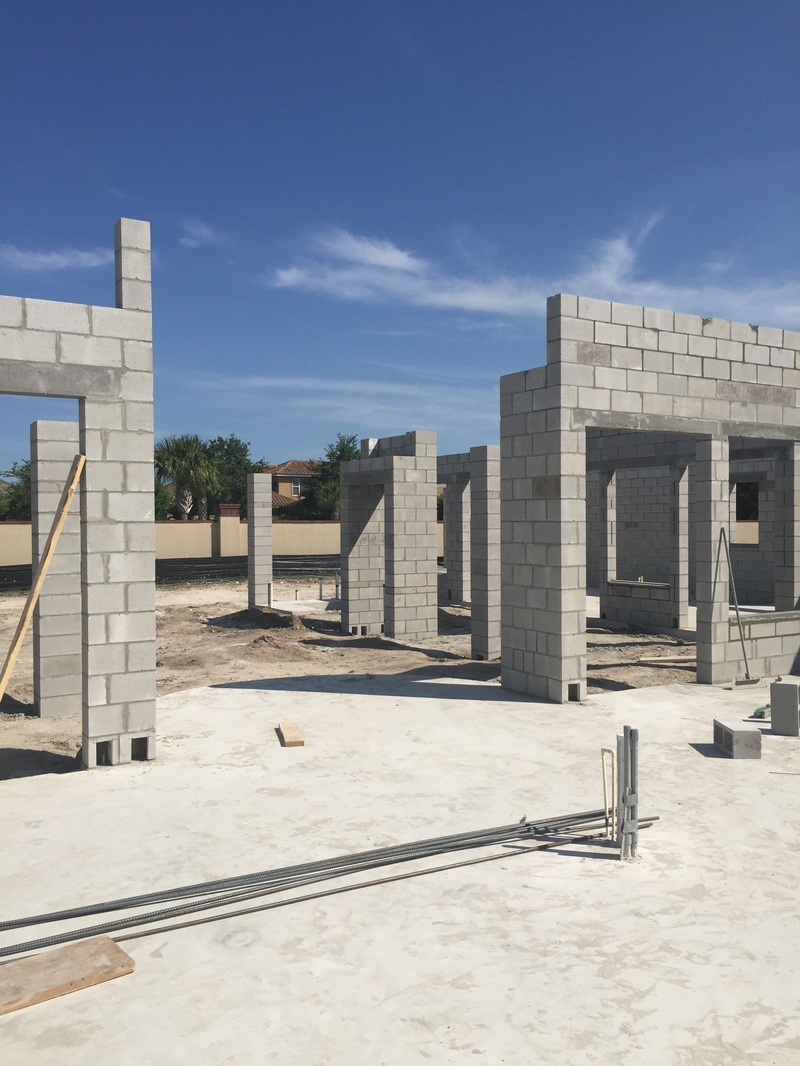 Hello again everyone, Work has finally begun on my new Country French design. What you see in the first photo are the curved wood forms for the circular Entry and Foyer. This area of the house, along with its corresponding two story turret, will be the most prominent design element of the home. The foundation is being built using a four inch thick wire mesh and fiber mesh reinforced concrete monolithic slab. Other areas of the country use wood floor joists and/or floor trusses along with foundation walls for basements and crawlspaces. However in Florida, because of the high water table, most foundations are built with monolithic slabs like the one in my photo. Concrete monolithic slabs are the least expensive type of foundation that you can build. Unlike most other areas of the country where it is always cheaper to go up with a second floor, just the opposite is the case in Florida. You can also see in the background that the underground plumbing is now in place. All of this will be inspected by the building department before it is covered up with dirt. Of course, the steel rebar still has to be installed in the exterior and interior wall footings. The rebar will then be inspected prior to the slab being poured. The second photo is of the future Summer Kitchen area. Please note that the water lines are all covered in an insulating sleeve. The insulation is critical because these water lines are all connected together in a continuous loop and ran thru a recirculating hot water pump. The pump keeps hot water circulating thru the house at all times. At any fixture in the house and at any time, hot water will be instantaneously accessible. Please stay tuned next week as I show photos of the poured slab, as well as photos of the concrete block being installed. Have a good week and weekend! Jeff 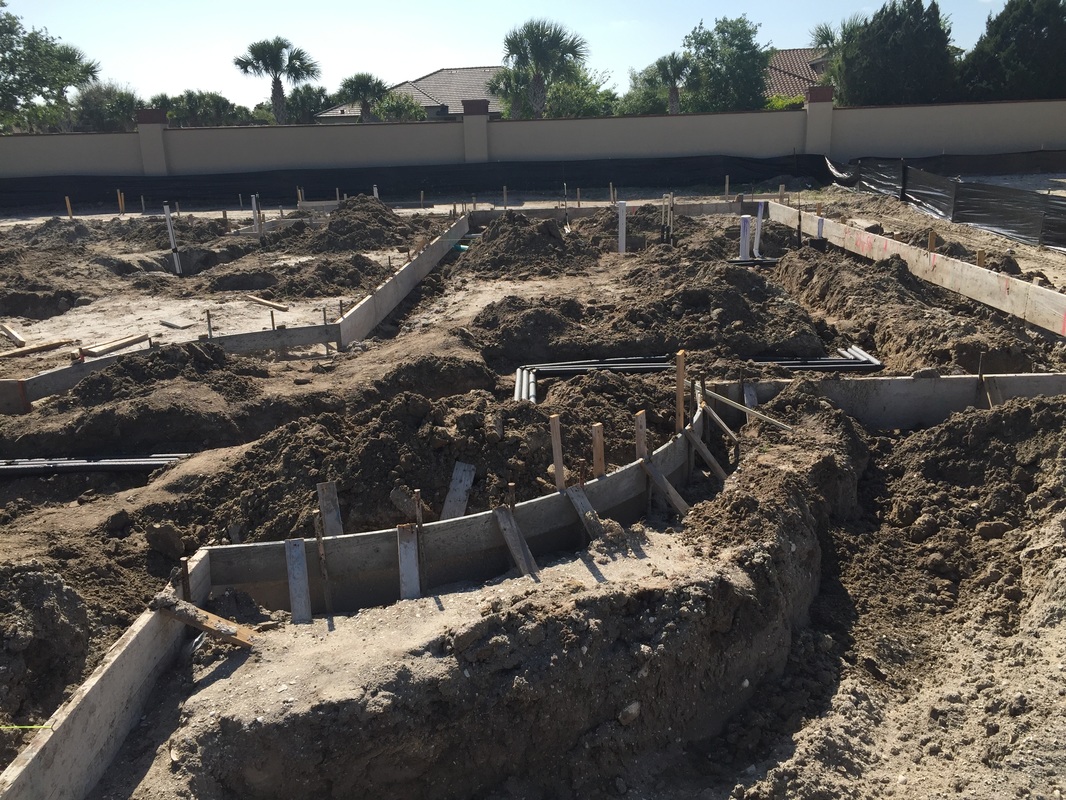 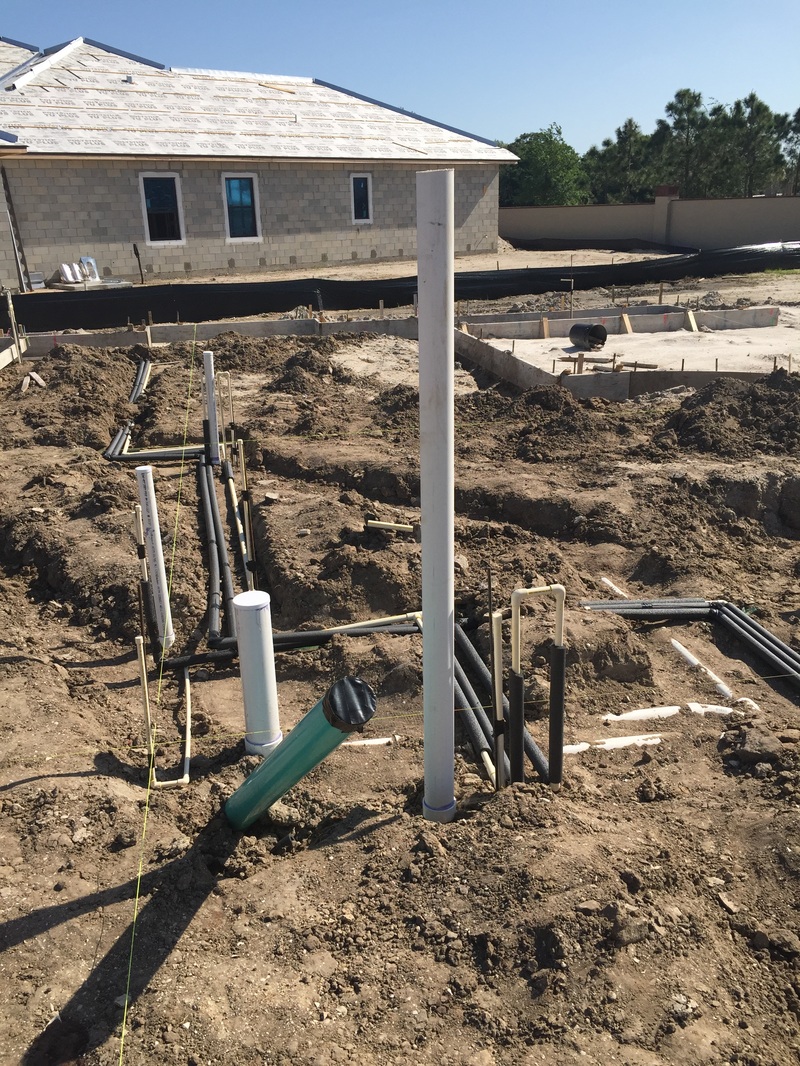 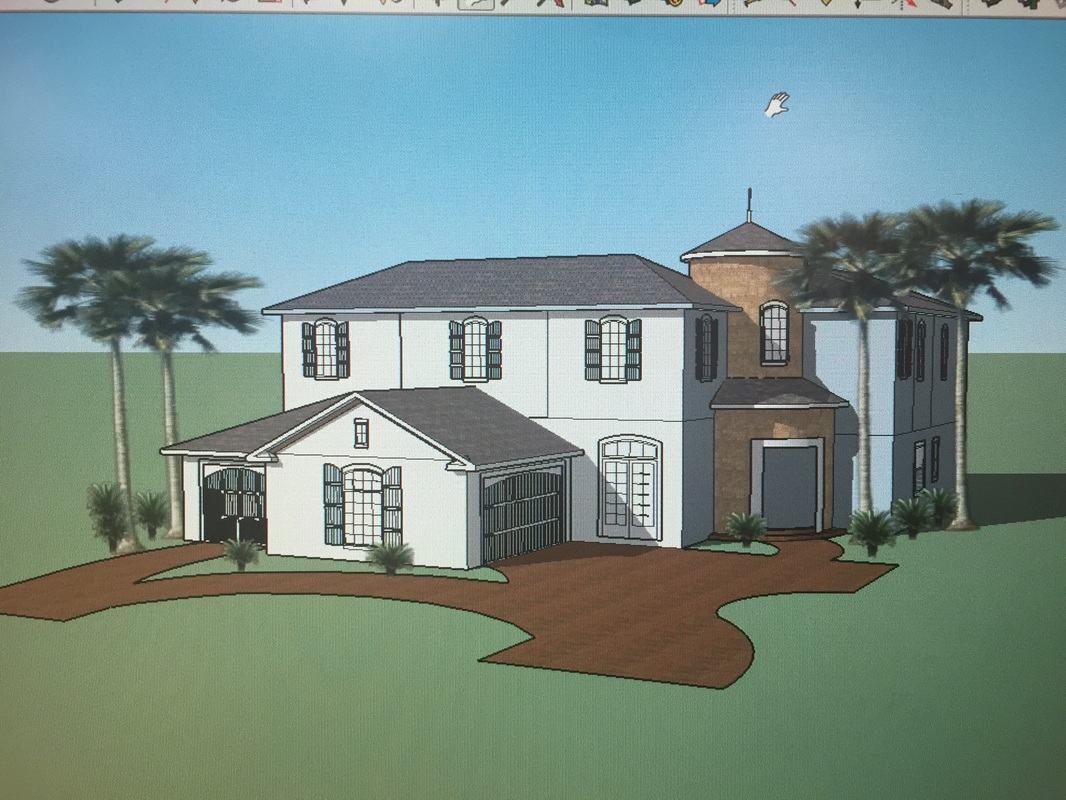 Good morning everyone,
Please follow this post to watch the progress of this soon to be built new custom home. It will be a very exciting home constructed in the Country French style. It it 3375 s.f. under air. It will have a beautiful outdoor fireplace and Summer Kitchen area. As you can see above, it will also have a really striking, round Entry turret covered in cultured stone. Stay tuned! Jeff  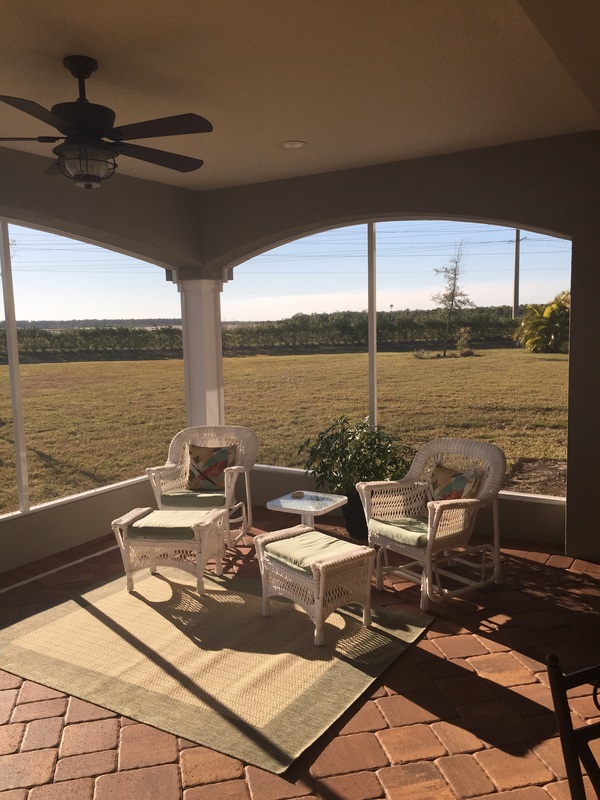 Hello again every body,
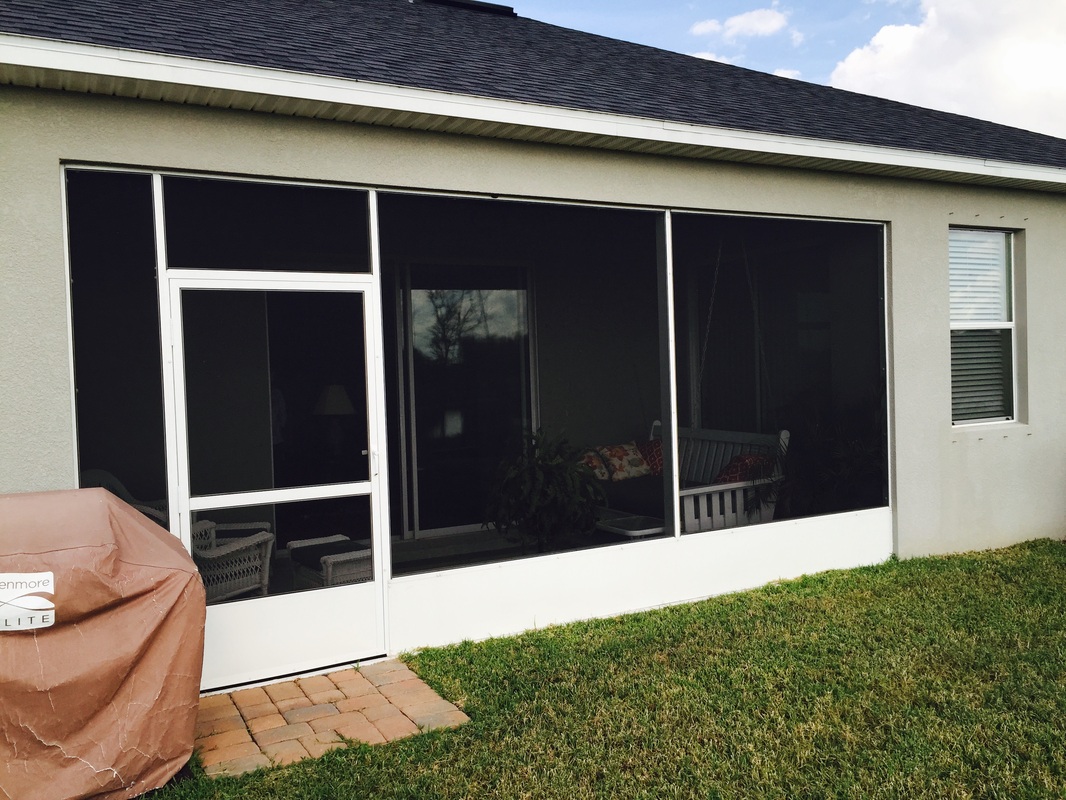
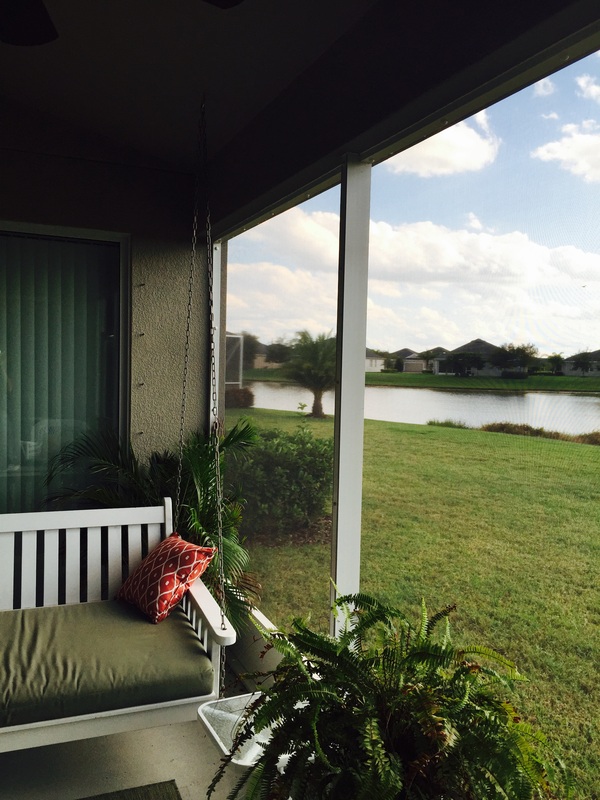
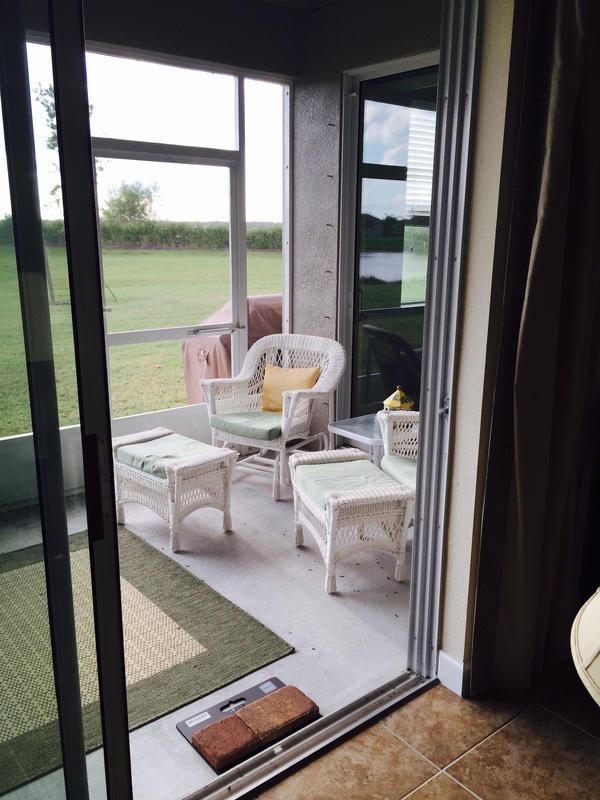
As you can see from the photos above, this project is now completed. The clients are happy, as is the builder. Again, I hope this blog has helped you to see what a small investment in adding an addition to the back of an existing house can do to transform its look and functionality. Stay tuned for my next blog where I follow the progress of a two story French Country styled custom home as it is being built up from the ground up. Have a great weekend! Jeff 
Hello again everyone,
As you can see, things are moving along quite nicely. The roof trusses are in place and the arches are constructed. Also, please take note of the decorative fiberglass columns. Of course, the base and capitals still need to be slid into place. What a dramatic difference from what we started with.! Most people do not realize what a seemingly small addition can do to transform the look of their house. Please stay tuned for future progress photos. Jeff 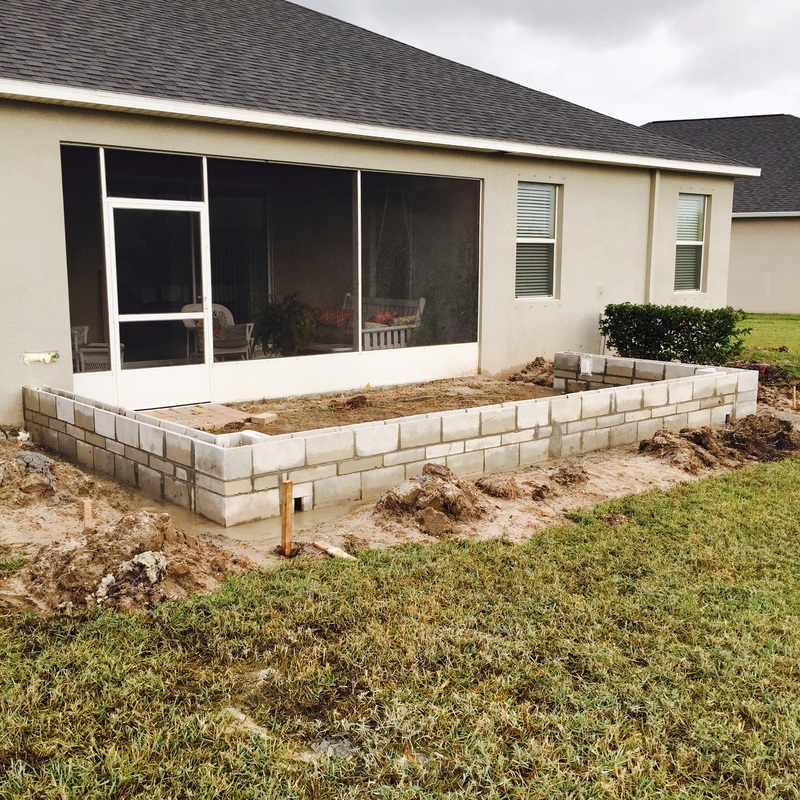 Hello again everyone,
Obviously, you can see the project is under way. What you above is a photo of the concrete block wall knee wall that encloses the Covered Porch extension. The new decorative columns will be placed on top of the pedestals in the corners. The next photos to be posted are after the carpenters have started their work. Please stay tuned! Hello again everyone,
I am going to start periodically showing the progress of an addition I designed for a existing home in Viera. The original house was built by a large national tract builder who, in an effort to keep his costs down, only provides a very small and boring rear Covered Porch. My design for the new addition will have the following changes made to it: adding 12'-0" onto the rear of existing Covered Porch; adding two skylights to bring light back into the interior of the house; arching the back and sides of the Covered Porch; adding decorative columns; adding pavers on the floor of both the existing and new parts of the Covered Porch, and attaching a screen enclosure on top of a new concrete block/stucco knee wall. I have done many similar designs for additions the last few years. My clients all seem to love them very much. Stay tuned! Jeff Hello again, |
Archives
January 2017
Disclosure: We are a professional review site that receives compensation from the companies whose products we review. We are independently owned and the opinions expressed here are our own.
Categories |